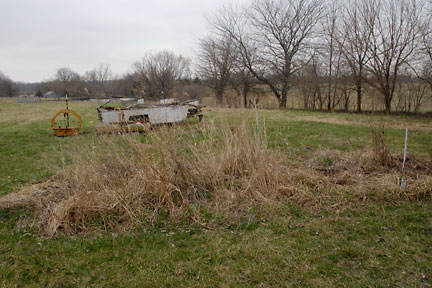
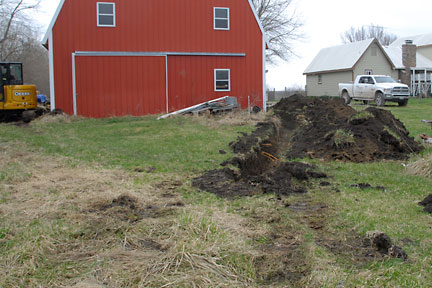
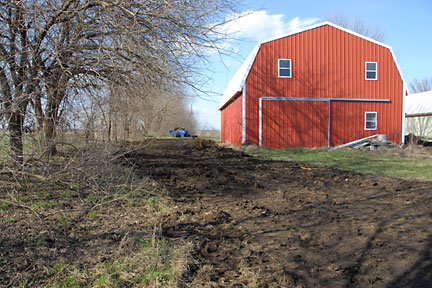
I had been wanting to get this done since the day we took possession of the farm... fix the garage drainage problem. You see, for some unfathomable reason, the previous owner (a General Contractor, no less) built the gambrel "barn" garage in a low spot. The land on all but the south side slopes TOWARD the building which means water makes it's way inside during every heavy rain. All things metal rust, all things cloth mold, all things wood rot in a too moist atmosphere. Yes, we knew about it before we bought the place... I've said it before: nothing beats 20 acres adjacent (in reference to the pro/con list of our decision making process) and the hubby was sure he could fix the problem.
To his credit, the hubby DID make an effort by digging along the west side of the building; creating a flat/slight slope away from it of about 3 feet wide. Unfortunately, because the rest of the area was a couple of feet higher, that flat area still got very wet and it was difficult to mow the resulting steep hill. Then he dug a little ditch from the north side of the garage through the field to help move THAT water away; which caused more runoff going toward the road and that is not a good thing. (Not to mention how annoying it is to mow across that ditch, ugh.) For all his good points, the hubby hasn't got a firm grasp on moving water without simply moving the problem... most people have this same issue, so he is in good company.
What we needed for the garage was french drains... quick description is this: picture a moat around a castle (leave out the water for our purpose), put a base of course gravel at the bottom, then extend a tube the distance of the moat with lots of holes piercing it (and open weave fabric around it to minimize dirt getting into it), cover that with a layer of soil, another layer of course gravel and then top it off with soil (be careful not to compact it) or (where you need to drive into the building) medium-grade gravel. The non-compacted soil and gravel allows large amounts of water to infiltrate deep into the ground instead of running off to the most convenient gathering spot... in our case the interior of the garage. Now, picture that gravel/tube/gravel-filled moat created with a bit of slope going in a particular direction to move that water where you want it to go and, once away from the building, change out a solid tube for the pierced tube to where you want it to emerge from the ground... that is called a "drain to daylight". Most of the water soaks into the ground before it gets to that solid tube, BUT if the amount of water is SO much that it even overwhelms the infiltration capability of the gravel, that excess water exits by way of the drain to daylight.
The years I spent studying sustainable building helped me to understand how difficult water problems can be and why finding a professional who knows what they are doing is SO important. The repairs on the house had to take priority when we did find money to invest in repairs. Therefore, the garage was at the bottom of the list and while we gritted and ground our teeth dealing with rusting tools, moldy cloth, etc. we knew we had to bear it until we got the other things done.
The other side of our dilemna was finding a contractor who would work on our project. We needed someone who understood about water run-off, moving dirt and working in close proximity to an exisiting building. Over the last 10 years, I have asked for references from every farmer I've met, every business that has done work here, the propane folks (they know EVERYBODY), the MFA... you name it, I've asked. If the recommended person/business was familiar with water runoff, they didn't want to deal with the building; if they were good with moving dirt, they didn't want to deal with the building... gee, a pattern arises. No one wanted to take a chance of damaging the building... can't really blame them for that.
Then, at the 2016 November Election, I was subbing at one of the Odessa Poling Places and the Election Judge I was partnered with (she knew EVERYBODY) introduced me to a lovely woman whose family does construction. My Pavlovian reaction was to ask if she knew anyone who could put french drains around an existing building. Sure, was her answer, my nephew does that. My jaw fell to the floor. She gave me his name and phone number and I am so thankful for her (and the woman who introduced us!).
Of course, I was nervous to approach him. I'd been burned before after each contractor saw what we needed. So, I put off contacting him and besides there was no money at that moment. Then the **it hit the fan with my aging parents (read all about that here) and my time was required elsewhere.
Enter the "we can't put this off any longer" panic of the north porch and siding on the house. We had to come up with a way to pay for these necessary repairs. When I found the money to replace the north porch (click here for the porch story) and re-siding/painting the house (click here for the siding/painting story), I discovered we might just end up with enough to cover the garage as well (or at least I was hoping to) and so I gathered my courage and called the nephew who does excavation: Robby Hotmer. He was very nice and after I described what we needed, he thought he could help us. So, almost a year after getting the recommendation he came out and gave us a quote for the job. An actual quote! He did not seem nervous in the least to work around the building. YIPPEE.
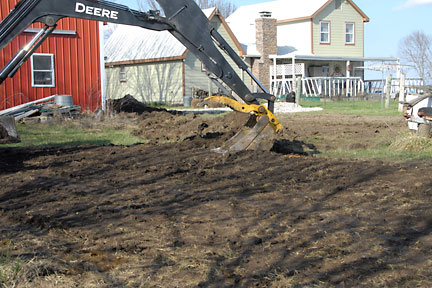
He was booked until Spring, but that was just fine because I was overseeing the porch and then the siding. So it was March 30th when he and his associate came out to do the job. And what a FINE JOB they did! |
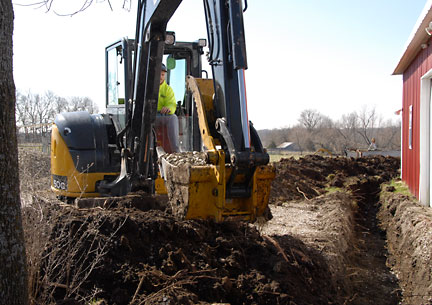
Digging
 |
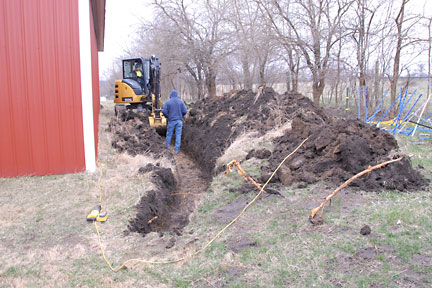
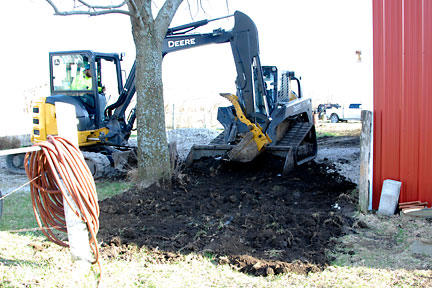
It was kind of scary watching them start right by that tree and the electric line.
But there was no need to worry.
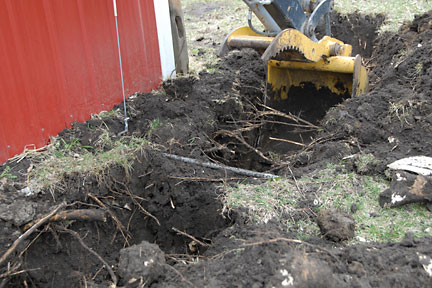
I'd forgotten to think about what would happen to that tree. Look at all the roots that go TOWARD the garage. It was surprise to me but in hindsight it shouldn't have been.
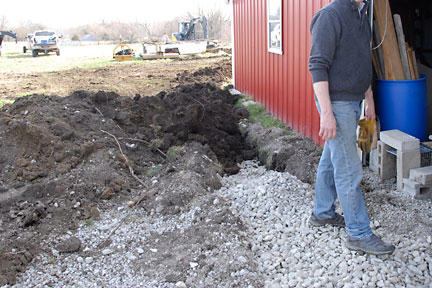
You can also see the exposed gray tube. The digger was used to take soil away from either side but what was underneath was removed by hand. |
 |
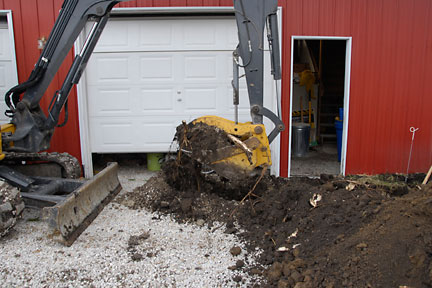
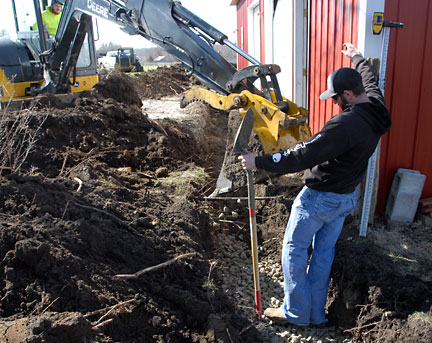
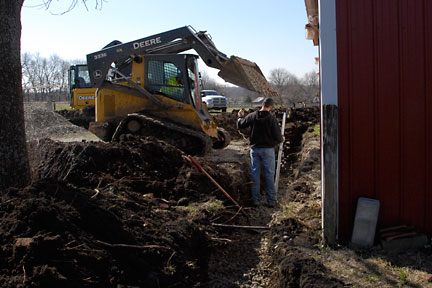
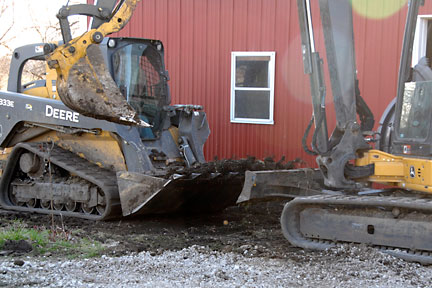
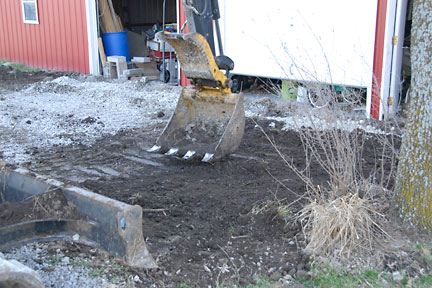
This shot is to show you how close to the garage they were able to get. |
 |
The dirt (and or gravel) was lifted out and left next to the ditch so it would be close for filling in when the time came. |
 |
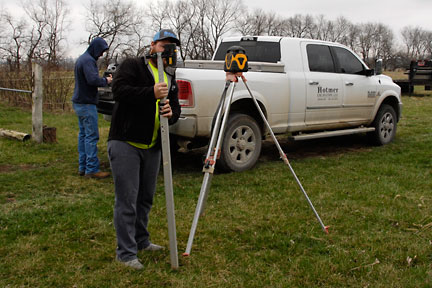
The assistant checked the depth often (the measuring stick part of the laser level is directly in front of his head in this pic).
He used a hand shovel to remove the dirt from under the electric line and also to cut any roots that were problematic. |
 |
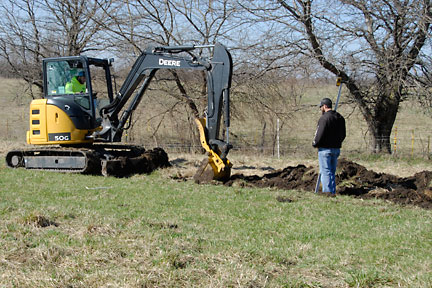
On to the driveway area. |
 |
I tried to get a couple shots of the claw in its various positions so you can see how it looks like someone's hand scooping up the soil et al.
Note the size/length of that root on the pile! |
 |
They had to stop almost immediately after I took the last picture because the root of the tree was too large to break off with the digger claw.
Out came the reciprocating saw to cut it at the garage door after cutting the exposed end on the other side of the ditch.
That was a primary root! Oh dear, we will probably lose part if not all of that tree in the coming years.
We figured out that the water going into the garage was the source for this root's water supply. |
 |
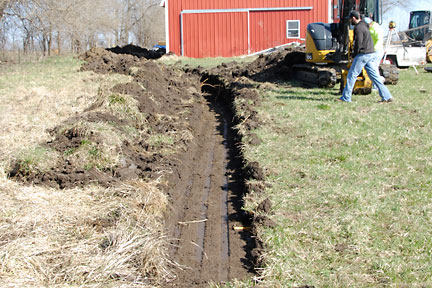
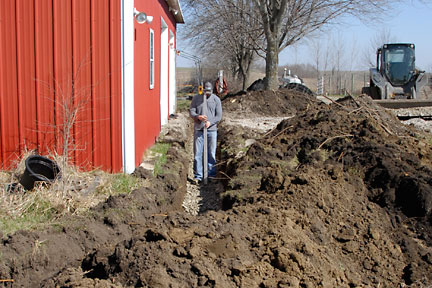
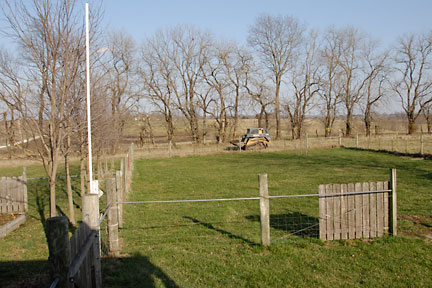
The ditch all dug on the east side. It gradually goes downhill.
|
 |
Note that they did not leave dirt on top of most of the driveway area. They set that aside to make clean up easier. |
 |
Here is the ditch from the east extending to the south where the two (2) ditches will joing for the drain to daylight.
The ditch is shallower here because the land slopes more here than the ditch does.
You can see the digger on the west side. |
 |
From the north looking at the west side. Wow that is A LOT of soil!
Those orange roots come from the Osage Orange trees in our fence line.
See how the hubby moved the electric cord out of the way. |
 |
The two (2) ditches meet and become one (1) drain to daylight. |
 |
It is amazing how they can take just an inch or so off where it needs it.
These guys used mostly hand signals (noise of the machine) and were SO in sync with each other. It was incredible to watch. |
Tubing and Filling It In
 |
It is difficult to get a good picture of black stuff on a bright sunny day.
This is the pierced tubing with the net material around it that goes in the ditch over the course gravel and a bit of soil which cushions the tube from the gravel. |
 |
This is the solid tubing that is the drain to daylight. |
 |
This picture shows the difference between the gravel already on our driveway and the course gravel going into the ditch.
Normally, they would have preferred the same size as we use on the driveway, but it was not available and bigger is better than smaller when it comes to draining water.
Because they knew this before they started digging, they separated our driveway gravel that was removed and used it on top of the bigger gravel in front of the garage doors. |
 |
There are two (2) full loads of gravel in this pile. We were surprised that it would take that much... but it did. There was very little left over and it was spread out on our driveway. |
 |
The claw of the digger getting gravel to fill in after the tubing has been laid and a bit of soil put on top to cushion it from the sharp edged gravel. |
 |
The reach of the arm is amazing! It was no big deal staying on the gravel of the driveway and reaching past the tree to start laying the gravel at the north end of that ditch.
|
 |
Using the hand shovel to smooth out the gravel.
They put all the gravel in place before putting the soil over the top of it. |
 |
Just one of the hand signals between the guys as the digger gently dispersed gravel along the ditch.
They didn't dump a load and smooth it by hand each time... it trickled from that claw a little at a time until the claw was empty.
It was amazing to see the precision they have with that massive piece of equipment. |
 |
The even spread plus the assistant fine tuning some of the gravel. |
 |
Use the appropriate tool for the job at hand.
In the driveway, there would be NO soil put in above the course gravel and they did not need the reach of the digger, so they could use the earth mover that dispenses a larger quantity of gravel at a time.
|
 |
Once they passed the driveway, they went back to using the digger to disperse the gravel the rest of the way. |
 |
Same technique used on the west side.
Note that much of the soil has been removed on the west side already. There are pictures later of where it went.
The guys were nice enough to alter the hill on that side so we would be able to mow there more easily. |
 |
The north end of the east side was the last to be filled back in with soil because of the tree. They had to use the same care as they did with the gravel. |
 |
And this side was also filled in using the digger because I have some plants that I didn't want destroyed just to the left of that pile of soil. |
 |
Here you see the earth mover pushing the soil into the ditch (most of which is already done).
They were great about getting it down to where the grass was growing without damaging the grass very much. |
 |
The west side all filled in and the hillside being altered for easier mowing. |
 |
From a different vantage point. |
 |
All the ditching is filled in. Where it is not next to the garage, the soil is left mounded to slowly settle over the drain to daylight... that way the solid tubing is not damaged and no air pockets are created by compressing the soil. |
 |
Moving the last bit of soil over the drain to daylight. Another delicate location requiring the finesse of the digger.
|
Excess Soil, Making It Look Great, and Finished
 |
It is not as obvious as I had hoped, but this photo is suposed to show the depth of the AMAZING soil we have before we get to the clay layer.
There is a good 12 to 16 inches of top soil there. The clay starts just above the dark line from the digger claw.
The lowest roots that are exposed are just above the clay line.
I wanted to use the excess soil for the raised bed garden. |
 |
After the ditch was filled, they guys used the claw of the digger to load the earth mover (in those confined areas) for transport to where I wanted it. |
 |
There is a scoop on the front of the digger that they used to push the soil onto the earth mover. |
 |
The earth mover drove around the backyard (and big dog yard) with each load... I want to say there were five (5) or six (6) loads in total. |
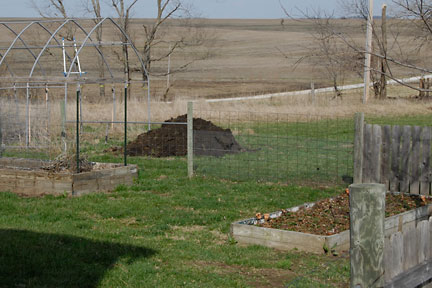 |
The put it in a pile by the ShelterLogic so it would be close enough to move into the garden area but out of the way at the same time.
This is probably three (3) loads. |
 |
It was a lovely big pile! |
 |
These pics just show the claw of the digger being used to smooth out the soil.
By using the back of the bucket, they shifted a little soil at a time and the result is amazingly smooth. |
 |
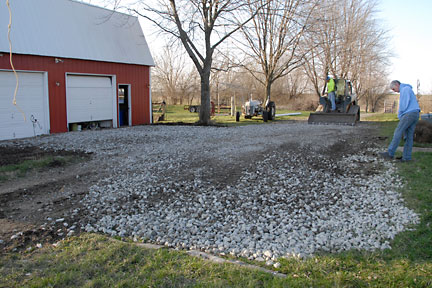
In front of the garage, they used tit to smooth the gravel and also to tamp it down (except over the ditch itself, of course). |
 |
The earth mover is finishing up moving the leftover gravel around the driveway and leaving a nice smooth surface as well.
The assistant is using a rake to fine tune the clean up.
Notice that the soil is not compacted over the ditch next to garage. The tire tracks show where they moved to and from. Yes, that area will need seeding in the spring. Now worries.
The decorative stakes mark the peonies I did not want disturbed. They weren't even bumped. |
 |
The west side after the hill is minimized. Also needs seeding in the spring. |
 |
Here they are using the digger blade to pull gravel out of the grass. Then they used the earth mover to scoop it up and spread it around the driveway. |
 |
Smoothing the dirt with a rake. |
 |
More clean up with the rake. |
 |
In the center of the image is the open end of the drain to daylight. They came back the next day with a fork-like barrier that fits over the end to keep critters out but let water out.
It fits over the opening and also deep into the ground to keep it from getting pushed out of the way. I did not get a photo of that. Sorry. |
 |
All done on the west. |
 |
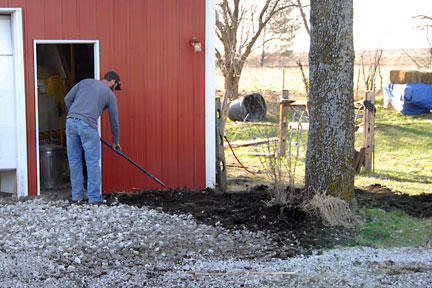
The hubby kicking some of the missed gravel off the grass and onto the driveway.
Once again, it took two (2) trips to remove the equipment. |
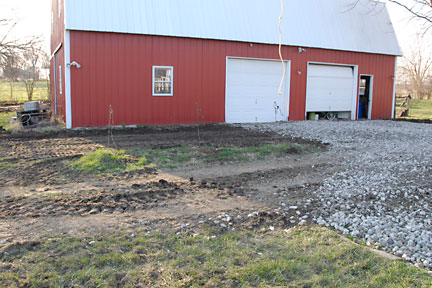 |
Construction is always messy. There is just no way around that.
Considering how much soil and gravel they moved, the results are amazing!
We are very happy with the entire experience and results. It took them only two (2) days |
Robby checked in with us in May to see if the project was a success. Yes! Since the project was completed, we have not had any standing water in the garage. Of course, we've been in drought conditions much of that time, BUT, we also have had some 5-inch downpours and the french drains work beautifully! There isn't even any erosion where the drain to daylight emerges and that is probably because they were so careful to not dig out the grass.
Because of the drought, I was not able to get as much of the area reseeded in 2018 as I would have liked. I have most of the seed I purchased stored in the cool basement waiting for the Spring of 2019.
|